Start with the Vault's reusable gems
Gems in Vault of the Beamcasters serve two purposes: they count toward your objective and power the beams that open new routes. If a passage seems impossible, check whether a collected gem is still sitting in an earlier holder. Recovering and reusing it is often the next step.
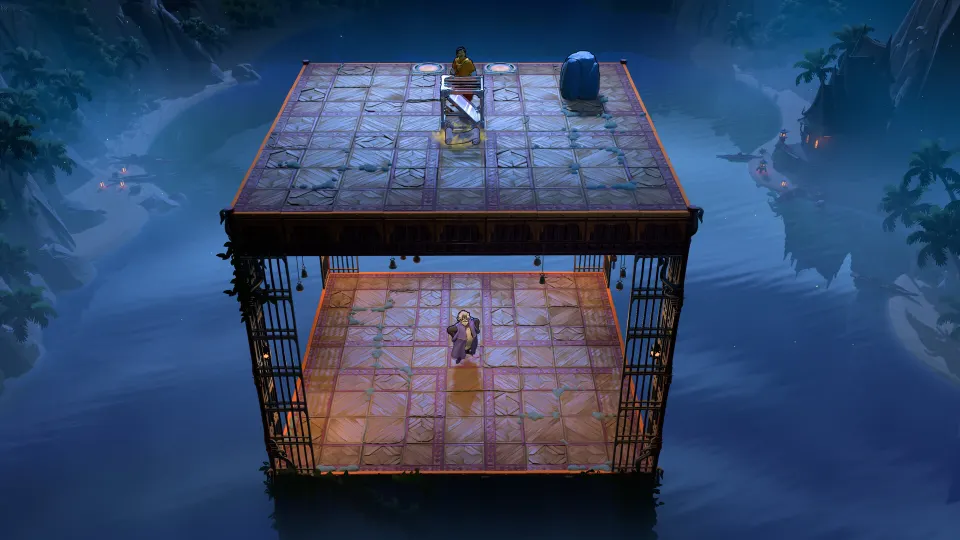
Vault of the Beamcasters Level 1, in the game's west world, requires 20 gems across two floors. The opening upstairs route centers on 12 gems.
| Part of the level | Gem objective |
|---|---|
| Upstairs | Collect 12 gems |
| Downstairs | Find the other 8 gems |
| Complete Level 1 collection | Account for 20 gems across both floors |
The route below explains the first eight pickups, followed by checks for later obstacles and a separate Beams and Mirrors hint. Gem numbers describe collection order, following Game Rant's Level 1 walkthrough.
Understand beam colors before moving gems
Placing a gem in a holder activates its connected beam. To use that beam's effect, position yourself within it before making the required directional input. Merely powering a holder does not finish the nearby obstacle.
| Beam color | Use in the opening route |
|---|---|
| Yellow | Destroy rocks and moving devices blocking access |
| Teal | Push rocks aside to uncover passages and gems |
| Red | Clear the red barrier near the starting area |
| Green | Move through walls along the beam's path |
| Orange | Perform the movement sequence leading to gem 4 and nearby intersections |
Beam intersections matter because they let you use overlapping effects. For example, a green and yellow intersection allows you to enter a wall and then destroy an obstacle from that position.
Before taking a gem out of a holder:
- Finish the rock-breaking or pushing operation it enables.
- Check whether you still need its beam to leave the area.
- Keep multiple holders powered when the next move requires overlapping beams.
- Retrieve the gem once the route no longer depends on it.
This prevents a common mistake: reclaiming a gem while still relying on green light to pass through a wall.
Vault Level 1: collect the first eight gems
Directions marked as screens mean crossing into another screen. Otherwise, a directional input means one movement step; repeated inputs are stated explicitly. “Fully” means continuing until movement stops.
Gems 1–2: open the western route
-
From the entrance, travel north two screens. Search the alcove to the right for gem 1, then carry it left to the holder beside the elevator.
-
With yellow light active, stand in its path and act downward to break the rocks guarding the map.
-
Move south one screen. From the yellow beam above the moving device, destroy it downward, then break the rock to your left.
-
Retrieve your powering gem. Take the opening you created and continue south two screens to a teal-beam holder.
-
Power teal, then use its effect to push the upper rock fully right. Push the lower rock downward to uncover gem 2.
-
Recover the gem from the holder. Return toward the entrance by traveling north two screens, east one, and south one.
Gem 3: combine green and yellow
-
Power the red beam near the entrance. Stand inside it and act downward to remove the red barrier, then retrieve the gem.
-
Cross the cleared barrier and power the next holder. Enter its green beam and move right through the wall.
-
Travel south one screen and activate yellow. Return north to the green-yellow intersection and break the rock to the right.
-
Continue north one screen. From yellow light, destroy the rock on your left.
-
Let the moving device lift the next rock into position. Destroy that rock before destroying the device itself, opening access to gem 3.
The order matters here: the moving device must reposition the second rock before you remove it.
Gems 4–5: follow the orange route
-
Go east one screen and activate orange. Move down into the beam, then down again to reach gem 4.
-
From orange light, make three leftward inputs to reach its intersection with yellow.
-
Act upward to destroy the rock in the alcove, then move upward again to enter.
-
Remain in yellow light. When the moving device approaches, act left to destroy it and reach gem 5.
Gem 6: activate the paired beams
-
Travel north one screen and place a gem in the holder there. Head south until you enter orange light, move left four times, then travel north one screen.
-
Enter the right-hand alcove and power its holder, activating teal and yellow beams.
-
Travel south two screens, east one through the wall using green, then south one.
-
Use yellow to destroy the upper two rocks. Switch to teal and push the third rock fully downward to expose gem 6.
-
Reclaim the powering gem before continuing.
Gem 7: enter the wall from below
-
Travel north one screen and east one. Power the holder that activates two teal beams.
-
Stand in teal below the rock and push it fully upward.
-
Move down once, left twice, and up once. Green light lets you enter the wall and reach gem 7.
-
Use the upper teal beam to push the rock right, then retrieve the gem powering the holder.
Gem 8: keep two holders powered
-
Travel west one screen and north one. Enter orange light, move right and then down, and follow the route north one screen.
-
Fill both holders to activate green. Stand where green overlaps yellow and move left into the wall.
-
When the moving device is above you, act upward to destroy it.
-
Move up to collect gem 8, then recover both gems from the holders.
Find remaining gems and diagnose blocked routes
Later progress involves revisiting obstacles with additional capabilities. Once you can push objects at a distance, inspect previously inaccessible rocks and movable devices again. That ability can create useful approaches upstairs as well as underground.
Pay attention to your position relative to the target. A block may be movable from one side while another approach leaves you unable to face it correctly. Also inspect touching objects: the demonstrated pushing behavior can move connected objects together.
| What seems wrong | What to check |
|---|---|
| An outlined activation square stays inactive | Some require multiple associated powerups to be active together |
| A gem remains behind a wall | Check whether green light provides an approach from another side |
| A moving device prevents access | Determine whether it must move a rock before you destroy it |
| Your collection appears short | Inspect holders on both floors for gems left powering beams |
In one basement setup, both a nearby holder and the holder to its left must be filled before the outlined square turns blue. Treat these grouped activations as a clue that several powered elements need to work together.
Separate two tasks during cleanup: freeing a gem and recovering gems already placed in holders. Clearing every visible obstacle does not automatically put every gem back in your possession.
For a visual continuation, Postmode's walkthrough playlist includes separate videos for the upstairs Vault collection and the underground route.
Beams and Mirrors: approach the last gem indirectly
A stubborn gem in Beams and Mirrors requires a different line of investigation from the early Vault puzzles. In a community discussion about one remaining gem, a player who had collected six others succeeded by tracing mirrors aimed toward the space below the pickup.
Try these hints in order:
- Examine the square directly beneath the gem.
- Identify mirrors whose reflected paths reach that square.
- Trace those paths backward to possible standing positions.
- Include distant or unexpected positions on the current screen.
The successful hint emphasized distance and an unusual standing location visible on the screen. That makes reverse-tracing the mirror arrangement more useful than repeatedly trying to approach the gem directly.
Apply this to the matching Beams and Mirrors situation. The discussion does not establish a universal solution for every isolated gem, and its commenters distinguish collecting the gems from the later challenge of positioning mirrors with the blue beam.
FAQ
How many gems are needed for the order of the sinking star gem puzzle?
Vault of the Beamcasters Level 1 requires 20 gems across two floors, with 12 in the upstairs collection. Other gem puzzles have their own layouts and objectives; the Beams and Mirrors discussion concerns a different seven-gem situation.
Are gems consumed when placed in holders?
The opening Vault route repeatedly retrieves gems from holders and reuses them elsewhere. Leave a holder powered while its beam remains necessary, then reclaim the gem when you can safely continue.
Why can I enter a wall but not clear the obstacle inside?
Check the beam overlap. Green enables wall traversal, while yellow handles destruction in the documented route. Gem 8 specifically requires entering the wall where both effects are available.
Does the eight-gem route finish Vault Level 1?
No. It covers the opening eight pickups. You must continue the upstairs collection, explore underground, and recover gems left in holders to account for all 20.