Start Here: Tutorial and Crossroads
Start north in The Hearty Heroes of Hauling, then explore east, south, and west for a recommended progression through increasingly demanding introductions. You can switch routes, so one difficult puzzle does not have to halt your adventure. This walkthrough explains the opening route, identifies gold room destinations, and helps you find solutions for the puzzle you are actually facing.
Complete the tutorial before planning your route. It introduces pushing rocks, running and slowing time, undoing moves, restarting levels, and unlocking cages. Practice undoing a move and restarting while the layouts are still simple; both tools become useful when you begin testing more complicated ideas.
At the Crossroads, follow these steps:
- Pick up the map directly above your arrival position.
- Listen to the recording in the center for advice about choosing a direction.
- Head north for the recommended first campaign, or east if mirrors interest you more.
- Use the menu option to return to the overworld whenever you want to change areas.
- Keep notes on unfinished puzzles so you can recognize them when returning.
Each direction contains an initial campaign associated with an achievement. These campaigns provide useful early goals, but the world allows you to explore them in any order. The recommended sequence is a way to manage difficulty, not an unlocking requirement.
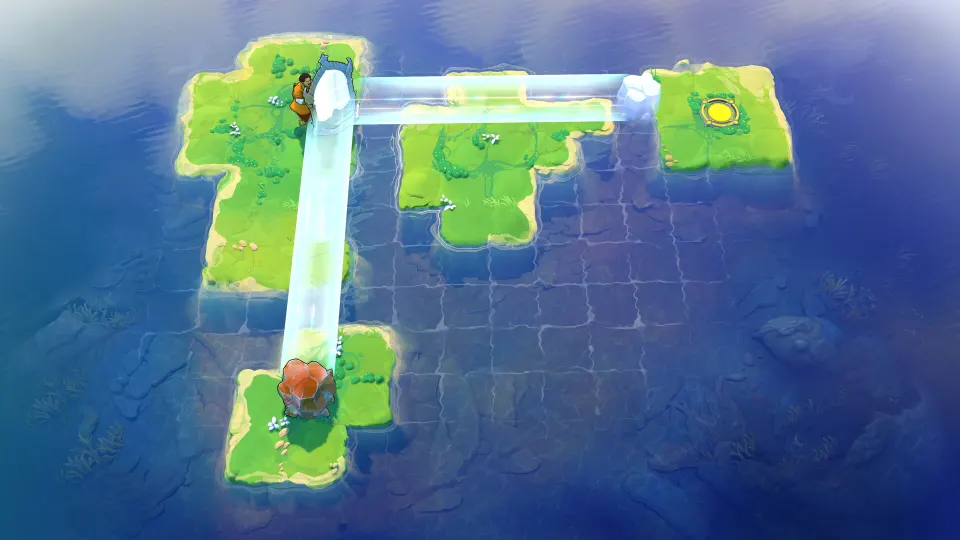
Choose Your Route Through the Four Worlds
The four starting regions introduce different puzzle rules. Learn what each region lets you manipulate before trying to optimize an entire solution.
| Suggested order | Direction | Region | Main mechanic |
|---|---|---|---|
| 1 | North | The Hearty Heroes of Hauling | Coordinate heroes with different object-manipulation abilities |
| 2 | East | The Mirror Isles | Use mirrors to transport yourself and objects |
| 3 | South | Skipping Stones to Lonely Homes | Push stones across water to create paths |
| 4 | West | Vault of the Beamcasters | Use gems and colored beams that grant abilities |
North: The Hearty Heroes of Hauling
The northern campaign begins with three heroes whose abilities must work together to clear rooms. Switching characters is central to solving these puzzles, so consider which hero needs access to an object before moving it.
Begin with the Hearty Heroes of Hauling walkthrough. Later sections have separate guides for Heroes 2: Monsters and Heroes 3: Bard and Druid. Match the party and obstacles to the appropriate section.
East: The Mirror Isles
Mirrors let characters and objects move between islands through reflection. Before acting, identify both the object you want to transfer and where it will arrive. A useful destination matters as much as reaching the mirror.
The campaign walkthrough is divided into Part 1, Part 2, and Part 3.
South: Skipping Stones to Lonely Homes
The southern region revolves around moving stones across water to establish routes. Its more open layouts can encourage elaborate plans, so first decide which crossing you actually need.
Use the Skipping Stones walkthrough for orientation, then the dedicated Level 1 or Level 2 solutions.
West: Vault of the Beamcasters
The western campaign combines maze navigation with collecting gems and using beam-granted abilities. It is the toughest recommended starting route, making it a sensible destination after practicing elsewhere.
Follow the Level 1 walkthrough before consulting Level 2. When following a solution, match both your location and your gem collection to the guide.
Open Gold Rooms and Explore Combined Worlds
Gold rooms introduce another layer of exploration and provide access to additional areas. Their labels identify combinations of the starting worlds: H refers to Heroes, M to Mirrors, S to Stones, and B to Beamcasters.
Use the room label and overworld position together when choosing your next guide. Finding a room, opening it, and solving the connected area are separate tasks, so a room solution may only cover one part of your journey.
| Gold room | Overworld direction | Connected areas covered by guides |
|---|---|---|
| HxS | Far north and south | Heroes and Stones West; Heroes and Stones East |
| HxM | Northeast | Heroes and Water; Heroes and Mirrors |
| MxS | Southeast | Mirrors and Stones |
For HxS, continue with the western or eastern Heroes and Stones guide as appropriate. For HxM, the connected walkthroughs cover Heroes and Water and Heroes and Mirrors.
Postmode's video playlist also includes HxB and SxB gold room solutions. Its Torc walkthrough covers the approach to SxB, while a separate video demonstrates opening the room. For MxS, the playlist separates reaching the gold room from solving it and includes walkthroughs for Mirrors and Stones 1 through 6.
In combined areas, test how the familiar mechanics interact. A solution may depend on applying one world's ability to an object or situation introduced by another.
Find the Right Puzzle Solution
Identifying your puzzle accurately saves more time than searching through unrelated move sequences. Start with the region, then compare the starting layout, available characters, and visible obstacles. A guide for the right world can still be showing a different screen or a later visit.
Community resources offer several ways to narrow the search:
| Resource | Useful feature | Best use |
|---|---|---|
| Joric's interactive map | Level identifiers, image gallery, and links to individual markers | Locate a puzzle when its name is unclear |
| GameGuidesChannel's Steam guide | Solution videos with displayed button rows | Pause and follow inputs after matching the starting position |
| Postmode's walkthrough playlist | Videos organized around regions, gold rooms, and specific routes | Find a visual walkthrough for a named destination |
Prefer a level identifier over an informal color-and-number description when requesting help. For example, the interactive map supports a direct link to mirror_pals. This gives another player a specific puzzle to inspect.
The interactive map began with demo coverage, and its creator has been adding release levels. Treat it as a community project in progress rather than assuming every full-game puzzle is documented.
Before copying inputs, reset to the same starting state shown in the solution. If the positions stop matching, pause immediately and locate the first difference. Continuing from a mismatched board usually makes the remaining instructions harder to interpret. Some puzzles involve backtracking, so a video's playing order need not match your own route.
Collect Optional Treasures and Break Dead Ends
Clearing a route and collecting its optional rewards are different goals. The first Skipping Stones puzzle has six optional treasures, and at least one requires preparation well before its eventual collection.
Tsongor's Steam walkthrough highlights these checkpoints. The times refer to that walkthrough, not an in-game timer.
| Objective | Video checkpoint |
|---|---|
| Prepare for Treasure 6 | 00:16 and 05:03 |
| Treasure 1 | 00:32 |
| Treasure 2 | 01:41 |
| Treasure 3 | 04:10 |
| Treasure 4 | 06:46 |
| Treasure 5 | 08:28 |
If you want all six treasures, watch the early preparation before following the collection sequence. Jumping straight to a later reward can leave your board arranged differently from the demonstration. These checkpoints identify when to pay attention; they do not replace the full movement sequence.
For other difficult puzzles, use a short investigation loop:
- Define the immediate goal, such as opening a crossing or bringing a hero beside an object.
- Work backward from that goal to identify the position needed just before success.
- Test one uncertain interaction instead of changing several things at once.
- Undo the experiment, then use what you learned to revise the route.
- Switch worlds when you notice yourself repeating the same unsuccessful approach.
The Steam community puzzle-solving guide similarly emphasizes exploring possibilities and reasoning backward. Keep a separate note for optional treasures and unfinished routes. That makes returning productive without requiring you to remember every earlier obstacle.
FAQ
Is there a required route through the game?
No. The north, east, south, then west sequence in this order of the sinking star walkthrough is a difficulty-based recommendation. You can choose any of the four directions at the Crossroads and move between campaigns.
Which area should a beginner try first?
The Hearty Heroes of Hauling and The Mirror Isles are the recommended starting choices. Both introduce their mechanics more gently than Vault of the Beamcasters. Choose north for coordinating character abilities or east for mirror-based movement puzzles.
Can I leave a puzzle and explore somewhere else?
Yes. Use the menu to return to the overworld, then head toward another region. Changing areas is especially useful when repeated attempts are no longer revealing anything new. Some puzzle routes also involve backtracking.
Do the gold room letters identify different worlds?
Yes. H means Heroes, M means Mirrors, S means Stones, and B means Beamcasters. HxM therefore refers to the Heroes-and-Mirrors combination, while SxB combines Stones and Beamcasters.
Are the first Skipping Stones puzzle's treasures required?
They are optional objectives. If you want all six, follow a treasure-specific walkthrough from its early setup steps, particularly the preparation for Treasure 6, rather than relying only on a route-clearing solution.