Getting started in the south world
Lily pads can be redirected while they are already moving. If a crossing in Skipping Stones looks impossible, a timed stone push may be the missing move.
Skipping Stones to Lonely Homes is the south world in Order of the Sinking Star, accessible by heading south from the Crossroads. Its two numbered levels contain 13 and 12 puzzle screens, respectively.
On the first world screen:
- Push the right stone left into the other stone to form a crossing toward the lower island.
- Collect the map in the lower-left corner.
- Enter Level 1.
World screens and screens inside a level use separate numbering. “Level 1, screen 2” below means the second puzzle inside that level.
| Control | Keyboard | Controller | Purpose |
|---|---|---|---|
| Speed up time | Hold Alt | Hold L2 | Wait for drifting pads to align |
| Slow down time | Hold Ctrl | Hold R2 | Make precisely timed pushes |
For the directions below, an unnumbered push means one tile unless it explicitly sends a stone across water. A number gives the tile count; “all the way” means continue until blocked. Unlimited undo lets you retry misplaced pushes.
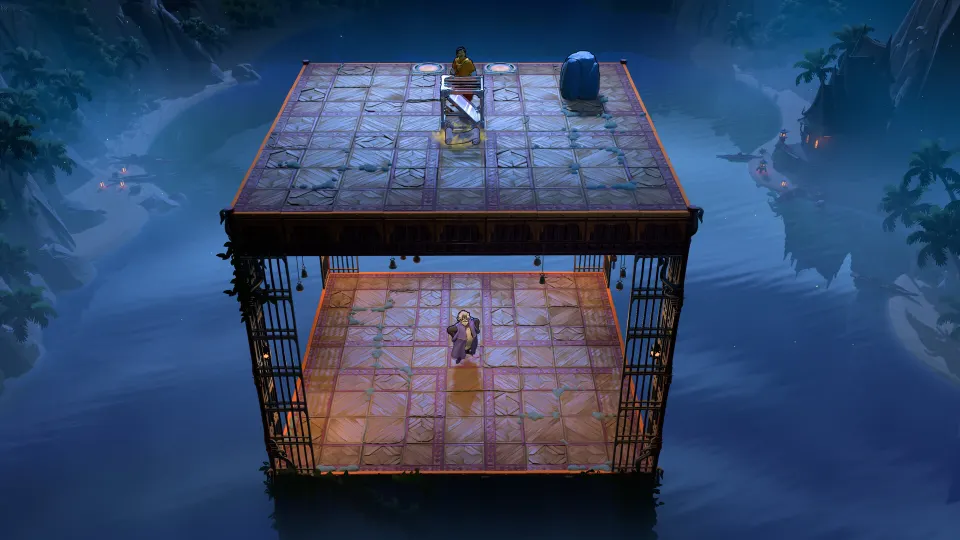
Level 1: opening puzzle solutions
Level 1 introduces stone crossings, lily-pad movement, and carrying stones between screens. Keep track of stones sent beyond the screen boundary: several later crossings depend on pieces brought from the previous puzzle.
Screen 1
- Move the left stone one tile left, then three tiles up. This shifts the left pad into the current on the right.
- Move the right stone up, left three tiles, right, then up twice. The second pad enters its current.
- Ride the pads across to the checkpoint and collect the map.
Screen 2
- Move the stone left, down twice, then right. Its collision with the upper pad sends the lower pad into the current below.
- Push the stone right again to clear it from the pad, then cross to the checkpoint.
- Move the upper stone down twice and right four tiles, repeating the interaction that sends the lower pad downward.
- Move the remaining stone right, up three tiles, then right three tiles. This sends the occupied pad into the current.
- Cross the pads, pushing the stone right as needed to reach the next checkpoint.
Screen 3
- Push the left stone right twice to send the left pad downward.
- Push the other stone left, then down, sending the right pad into its current.
- Ride across to the checkpoint.
- Send the right stone downward across the water, then push it right four tiles into screen 4.
Screen 4
- Push the right stone up to shift the upper pad right.
- Position another stone in the row immediately above the lower pad. Push right to send that pad downward.
- Position the last stone in the row above the upper pad, then push right to send it downward too.
- Cross to the checkpoint.
- Move the bottom stone down three tiles and right once. It now shares a column with the lower-right checkpoint; push it toward that checkpoint.
- Move the remaining stone up, right, down twice, then right. Push it fully downward to complete the crossing.
- Continue pushing that stone down three tiles into screen 5.
Screen 5
- Move the stone already on this screen right, then down across the water.
- Bring the imported stone into the same column and push it down against the first stone, forming a bridge.
- Move the first stone down twice, left four tiles, then up. Push left again to send the pad toward the island on the left.
- Move the other stone right three tiles and down. Send it left across the water into the first stone’s column, then down to build the checkpoint crossing.
- Push the stone up until it sits immediately below the pad, then left four tiles into screen 6.
For the remaining puzzles, continue with the Level 1 screen-by-screen walkthrough.
World screens 2–3: the timed crossing
After Level 1, return to the world route. The lower-left stone on world screen 1 is now accessible.
Push it down into world screen 2, then follow the path beneath the Level 1 entrance. Push the transferred stone left, then fully right. This knocks a lily pad down into the current. Ride it to the southern island and continue to world screen 3.
The puzzle on the left requires both riding pads and changing their routes:
- Board the left pad. Speed up time while waiting, then step onto the second pad when they align.
- Repeat the transfer to reach the third pad and central platform.
- Stand below the right stone. Wait until all three pads form a vertical line in the far-left current.
- Push upward at that moment. The lower pads should shift into the middle current while the upper pad stays outside.
- Stand left of the remaining stone and push right once. Push right again when a pad in the central currents passes in front of it, sending that pad into the inner current.
- Use the newly arranged pads to reach the teleporter, then proceed to Level 2.
Slow time for the two timed pushes. If the pads take the wrong routes, undo and adjust the moment of impact.
Level 2: coordinating two characters
Level 2 contains 12 screens and introduces a second playable character. Press C to switch control. The inactive character stays in place and can stop an incoming stone, allowing you to establish a stepping point where the stone would otherwise continue.
The walkthrough labels are C1 and C2. Either character can take either role in the early puzzles, provided you remain consistent. In the final puzzle, C1 must be the character used in Level 1.
For screen 2, begin from the arrangement reached after finishing the first cooperative screen.
| Step | Character | Action |
|---|---|---|
| 1 | C2 | Push the stone left four tiles, then down twice toward C1. |
| 2 | C1 | Place it in the column immediately left of the pad. Push up, quickly board the pad, and disembark on the island to the right. |
| 3 | C2 | Send the stone right across the water, then down toward C1. |
| 4 | C1 | Push right twice to place the stone below the pad, then push up toward C2. Step down afterward to clear its return path. |
| 5 | C2 | Board the pad, which sends the stone back toward C1. |
| 6 | C1 | Push left, then up beside the pad to carry C2 onward. Follow to the next screen. |
Before each handoff, check where the waiting character stands. Sometimes that character must stop the stone; sometimes they must move aside. Continue through the complete Level 2 solutions for later arrangements.
Interdicts, treasures, and completion
Interdicts are arrangements of markings that must be disturbed to remove their restrictions. Reach the marked ground or rocks and disrupt the pattern.
Look for these four named charting treasures while exploring:
| Treasure | Location | Identifying detail |
|---|---|---|
| Platinum ruler | Level 1, screen 7 detour | A wooden ruler with platinum markings that stretches lengthwise |
| Bag of pins | Level 1, screen 11 detour | Platinum pins decorated with different landscapes |
| Ink bottle | Eastern waters around the green island | An open bottle whose ink does not spill |
| Fountain pen | Chest on an isolated western islet | A platinum pen with a dial that changes its nib |
For the two Level 1 detours, push a stone onto a submerged brown rock near a screen corner to create the extra foothold. After collecting the ruler, bring the nearby stone back: it is needed to finish the surrounding puzzle.
For achievement completion, the south-world campaign walkthrough identifies both numbered levels, every interdict, the rescue of the surveyor’s boat Vedessud, and six optional chambers as the route to the Skipping Stones achievement.
FAQ
Why am I stuck at the orb or shrine puzzle?
A pad can change direction before finishing its current movement. Watch its travel path and time another stone impact while it is moving. Slowing time makes this interaction easier to observe and execute.
Should I take leftover stones into the next screen?
Yes, when the route calls for it. Level 1 explicitly transfers stones from screen 3 to 4, from 4 to 5, and from 5 to 6. Leaving one behind can remove a piece needed for the next crossing.
What does this order of the sinking star skipping stones walkthrough cover?
It covers the opening world route, Level 1 screens 1–5, the timed crossing before Level 2, a cooperative puzzle example, and named treasure locations. The linked level walkthroughs provide the remaining individual screen solutions.
Can a bad push permanently ruin the puzzle?
Use unlimited undo to reverse a mistaken move. For timing puzzles, return to the setup before the impact, then retry with a different delay or slower time.